Managing Remote Desktop Protocol (RDP) access to a Windows Server is essential for seamless remote work and server administration. A common issue encountered is the “User Account Locked Due to Too Many Logon Attempts” error. This error can disrupt operations, especially if your team relies heavily on RDP for daily tasks.
In this article, we’ll provide a detailed step-by-step guide to resolve this issue by modifying the Account Lockout Policy on Windows Server. Follow along to unlock accounts efficiently and ensure uninterrupted access to your RDP environment.
What Causes the Account Lockout Issue in RDP?
The Account Lockout Policy is a security feature designed to lock a user account after several failed login attempts. While it protects against brute-force attacks, it can lead to unintentional disruptions, such as:
- Users mistyping passwords repeatedly.
- Auto-reconnection attempts using incorrect credentials.
- Unauthorized access attempts from bots or malicious actors.
The solution? Adjusting the Account Lockout Threshold to prevent unnecessary lockouts. This step is particularly crucial for RDP administrators to maintain productivity while keeping the system secure.
Step-by-Step Guide to Resolve the Issue
Follow the steps below to modify the Account Lockout Policy using the Group Policy Editor on your Windows Server.
Step 1: Open the Group Policy Editor
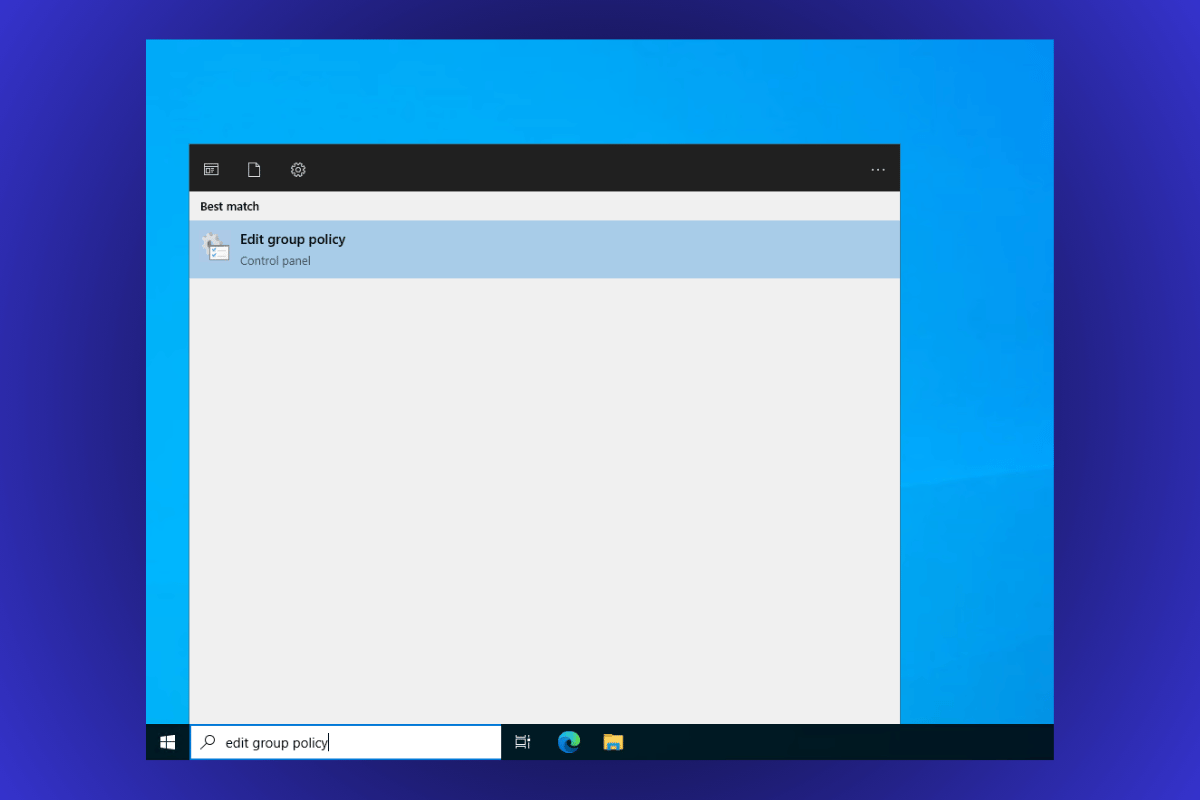
- On your Windows Server, click the Search bar in the taskbar.
- Type
Edit Group Policyand select the Edit Group Policy option from the search results.
This will open the Local Group Policy Editor window.
Step 2: Navigate to Account Lockout Policy
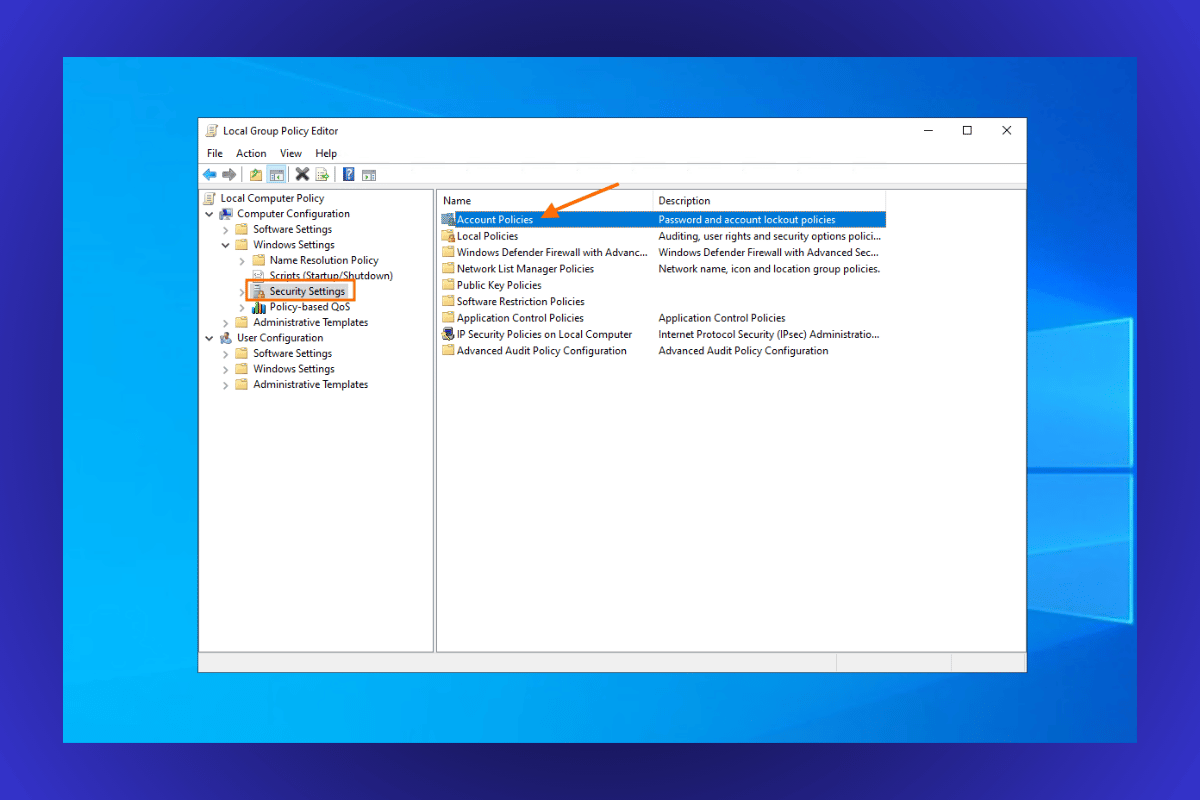
- In the Group Policy Editor, locate Computer Configuration in the left-hand panel.
- Click on Windows Settings under Computer Configuration.
- Find and select Security Settings.
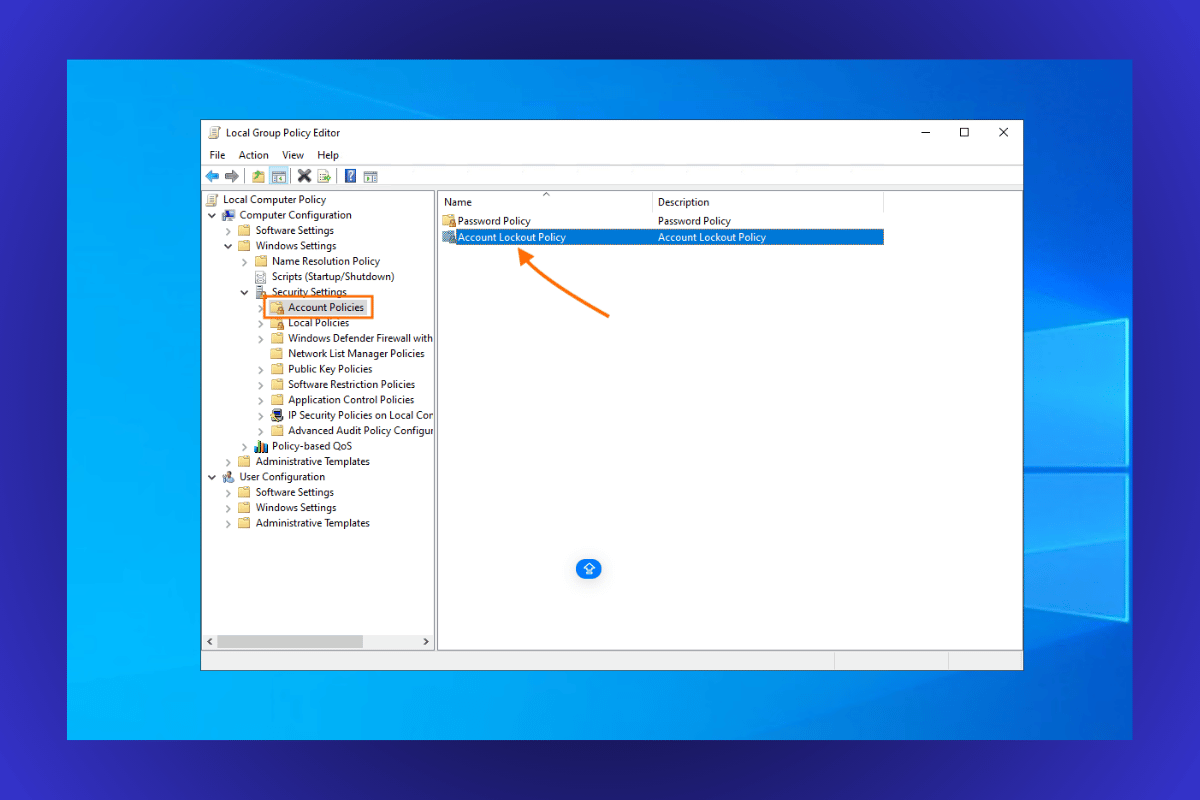
- Under Security Settings, click on Account Policies.
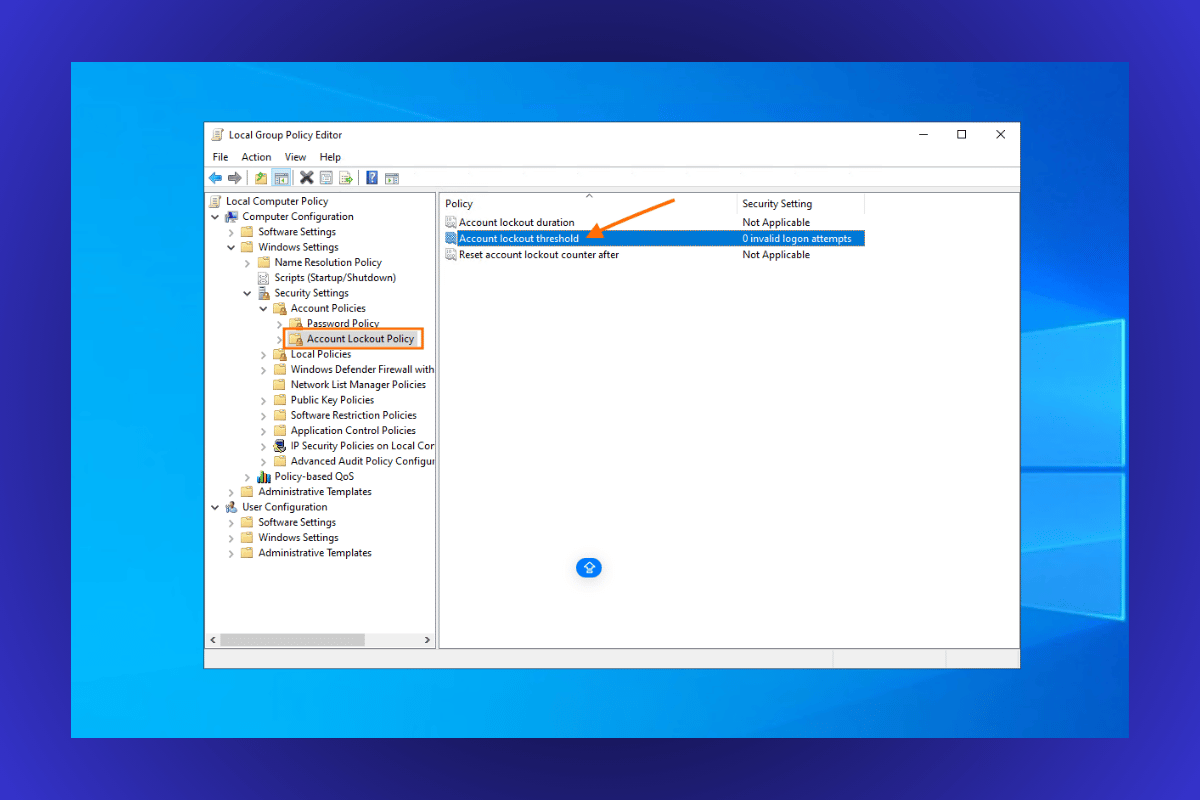
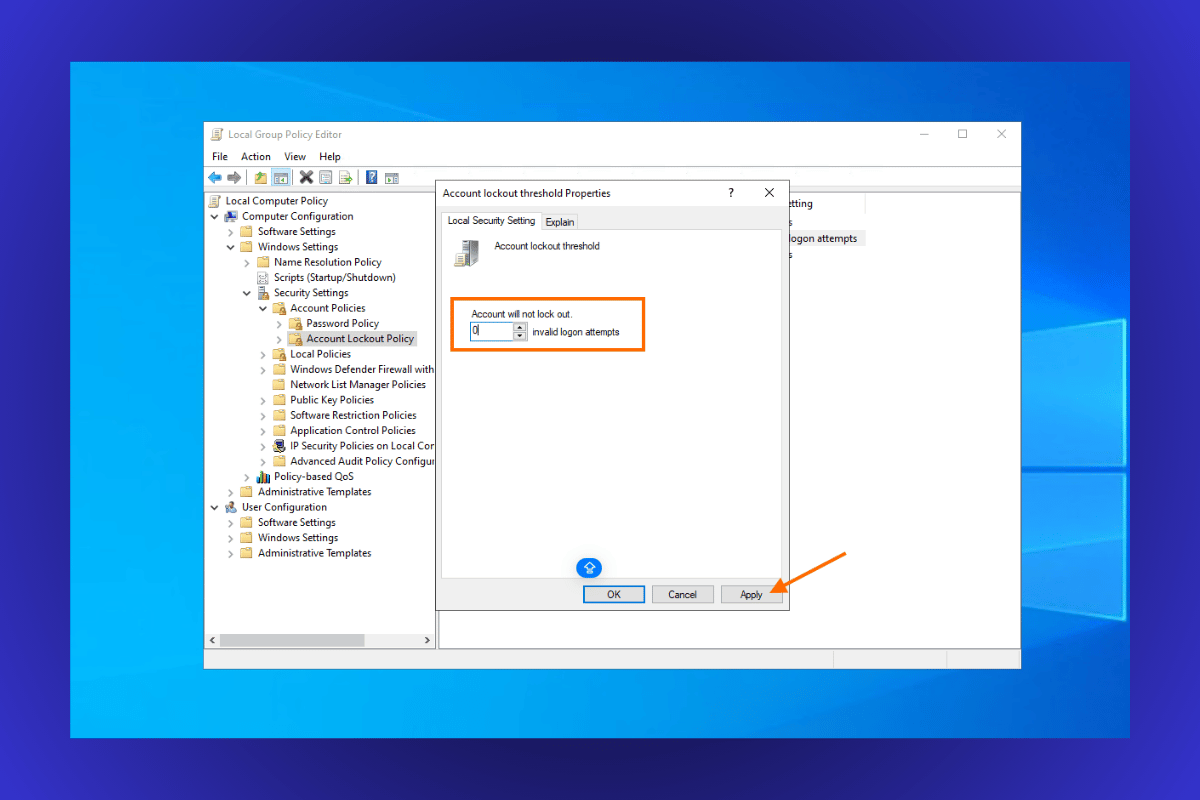
- Choose Account Lockout Policy.
Step 3: Change Account Lockout Threshold
- In the right-hand panel, double-click on Account lockout threshold.
- A pop-up window will appear allowing you to edit the setting.
- Set the value to 0.
- This disables the account lockout feature, allowing unlimited invalid login attempts.
- Click Apply, then OK to save the changes.
Tip: If you prefer not to disable the lockout entirely, set the threshold to a higher value (e.g., 10 or 15) to reduce unnecessary lockouts while maintaining security.
Step 4: Apply Changes to the Server
For the changes to take effect, you must update the Group Policy settings on your system:
- Restart the server by clicking Start > Restart, or
- Open the Command Prompt and run the following command:
gpupdate /force
This will immediately apply the updated Group Policy settings.
Step 5: Verify the Changes
Test the updated policy to ensure the issue is resolved:
- Attempt multiple invalid logins via RDP to confirm that the account is no longer locked after exceeding the previous limit.
- Ensure legitimate users can access the server without disruptions.
Security Considerations When Modifying Account Policies
While modifying the Account Lockout Policy resolves frequent lockouts, it’s essential to maintain a secure RDP environment. Here’s how:
- Implement Strong Password Policies: Encourage users to create strong passwords that include a mix of uppercase letters, lowercase letters, numbers, and symbols.
- Enable Two-Factor Authentication (2FA): Adding an additional layer of security ensures that even if a password is compromised, unauthorized access is prevented.
- Monitor Login Attempts: Use the Windows Event Viewer to monitor failed login attempts and identify suspicious activity. Regularly review logs to detect potential brute-force attacks.
- Set Reasonable Thresholds: Instead of disabling lockouts entirely, consider setting a higher threshold (e.g., 15 attempts). This reduces disruptions while providing some security against unauthorized access.
Common Troubleshooting Tips
- Group Policy Editor Not Accessible: If the Group Policy Editor isn’t available on your server, use the Local Security Policy (secpol.msc) instead.
- Changes Not Taking Effect: Run the command
gpupdate /forceto apply the new policy immediately.
Ensure you have administrative privileges to make changes. - Unauthorized Access Attempts: Check login activity logs in the Event Viewer to identify unauthorized attempts and block offending IPs.
Conclusion
Resolving the “User Account Locked Due to Too Many Logon Attempts” issue is crucial for maintaining productivity in your Windows Server RDP environment. By following the step-by-step guide above, you can quickly unlock accounts and prevent future disruptions.
At RDPWARE, we’re committed to providing reliable and secure RDP solutions tailored to your business needs. Visit RDPWARE to learn more about our offerings and how we can enhance your remote working experience.
Don’t let account lockouts slow you down—optimize your RDP experience with RDPWARE today!


