Changing the username in a Windows Remote Desktop Protocol (RDP) session is essential for various reasons, including security enhancements, organizational updates, and personal preferences. Whether you’re managing a server for business or personal use, updating your username can help streamline your remote desktop experience. This guide will walk you through the process of changing your username in Windows RDP, applicable to all major Windows Server versions, including 2012, 2016, 2019, and 2022.
For additional security, you may also want to change your RDP password. Check out our guide on How to Change Your RDP Password for more information.
Why Change the Username?
There are several reasons you might want to change the username in your RDP session:
- Enhanced Security: Using a unique and complex username adds an extra layer of protection to your remote server, reducing the risk of unauthorized access.
- Organizational Rebranding: If your organization undergoes a rebranding or changes its naming conventions, updating usernames helps maintain consistency and professionalism.
- Personalization: Customizing your username allows for a more personalized and manageable remote desktop experience, tailored to your specific needs and preferences.
Step 1: Connect to Your RDP Session
- Open the Remote Desktop Connection tool on your local computer. You can find it by typing “Remote Desktop Connection” into the Start menu search bar.
- Enter the IP address or hostname of the remote server.
- Log in with your current username and password.
Step 2: Open Computer Management
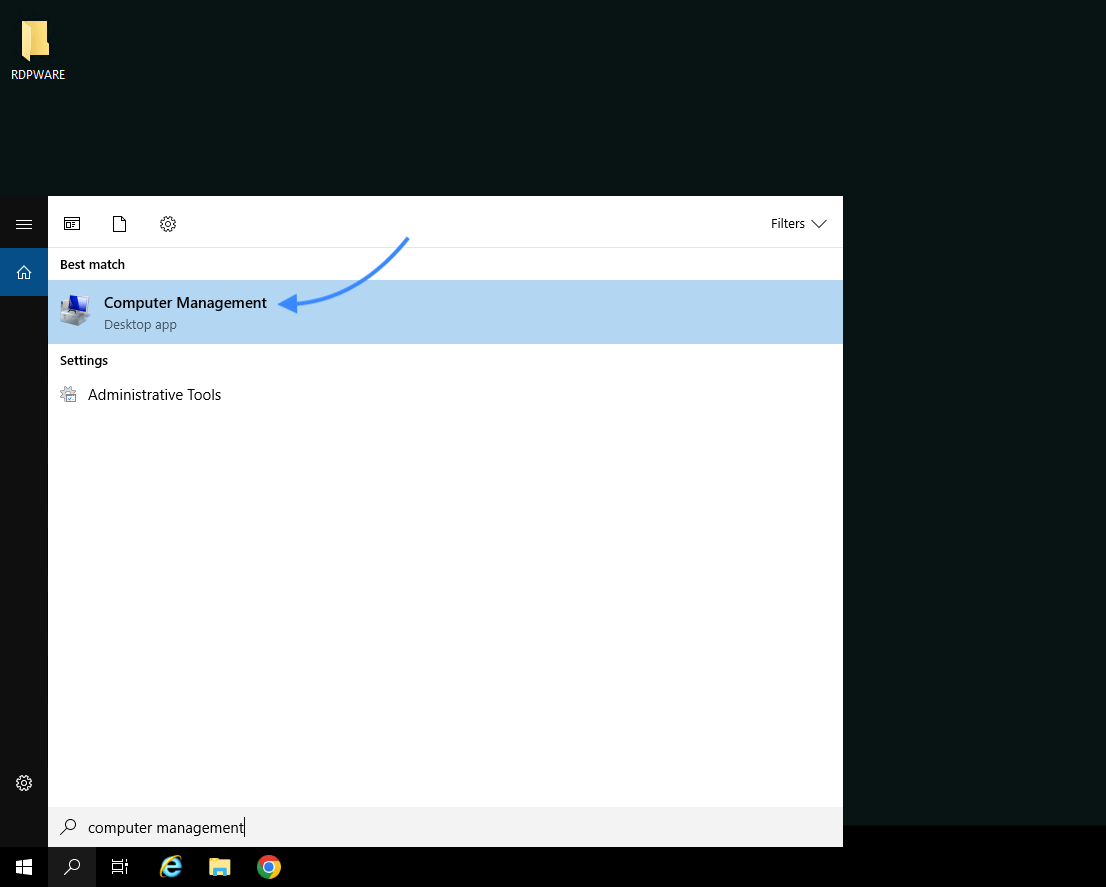
- Right-click on the Start button and select “Computer Management” from the context menu.
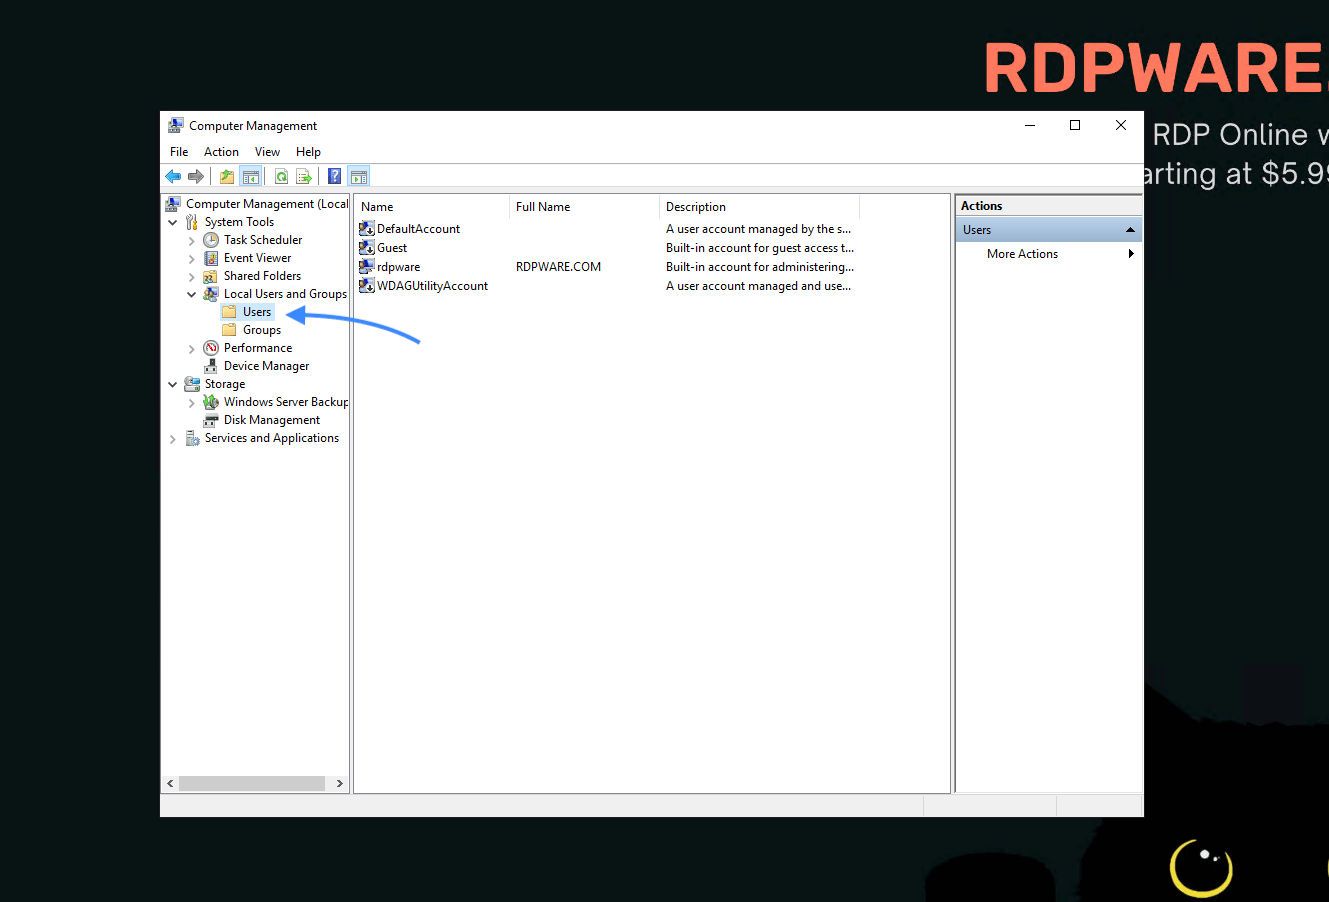
- In the Computer Management window, navigate to “Local Users and Groups” on the left sidebar.

Step 3: Access User Accounts
- Click on “Users” under the “Local Users and Groups” section.
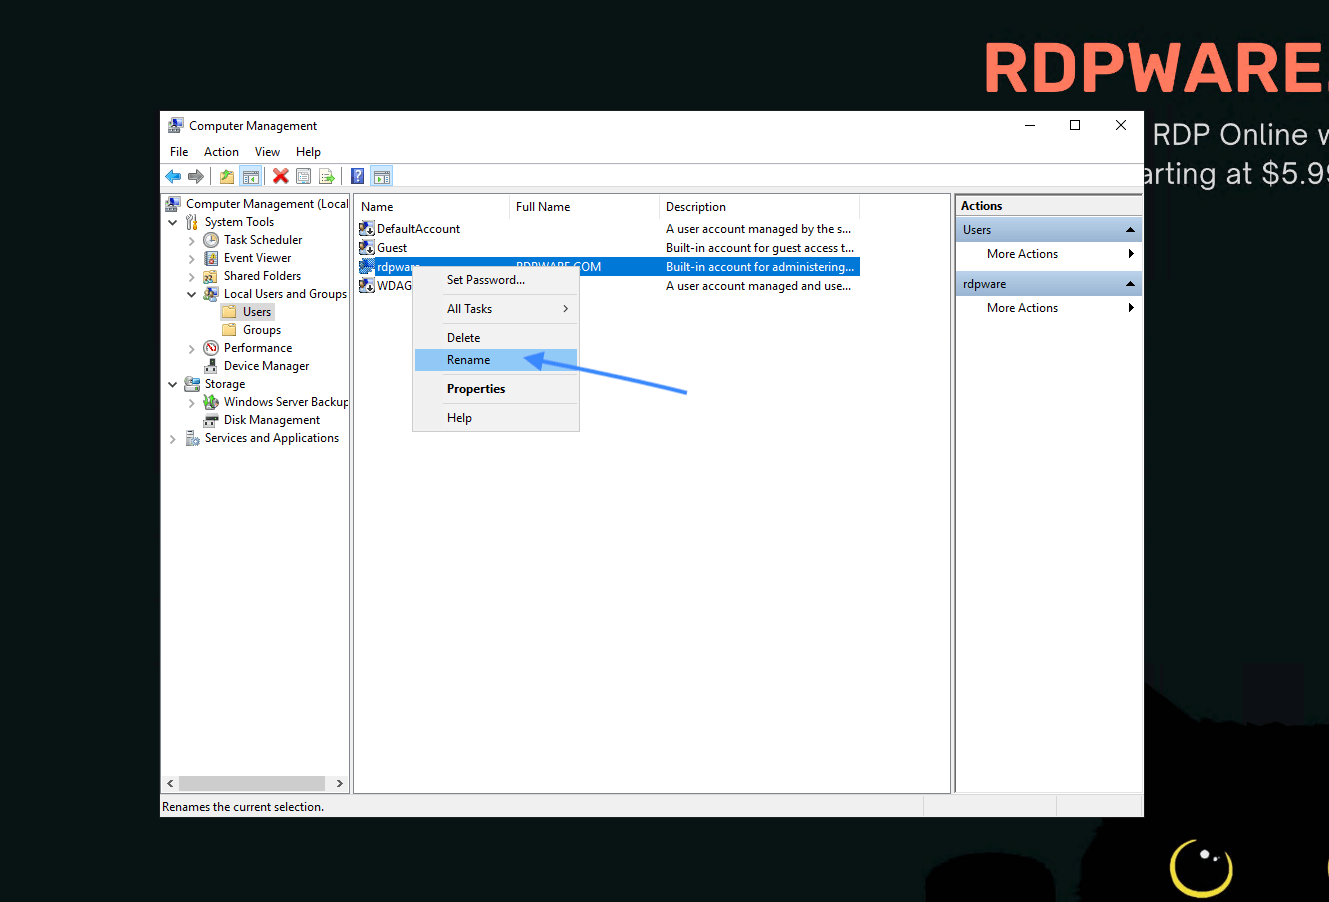
- In the right pane, locate and right-click the user account whose username you wish to change.
- Select “Rename” from the context menu.

Step 4: Change the Username
- Enter the new username in the field provided.
- Click “Change Name” to confirm and save the new username.

Step 5: Reboot Your RDP Session
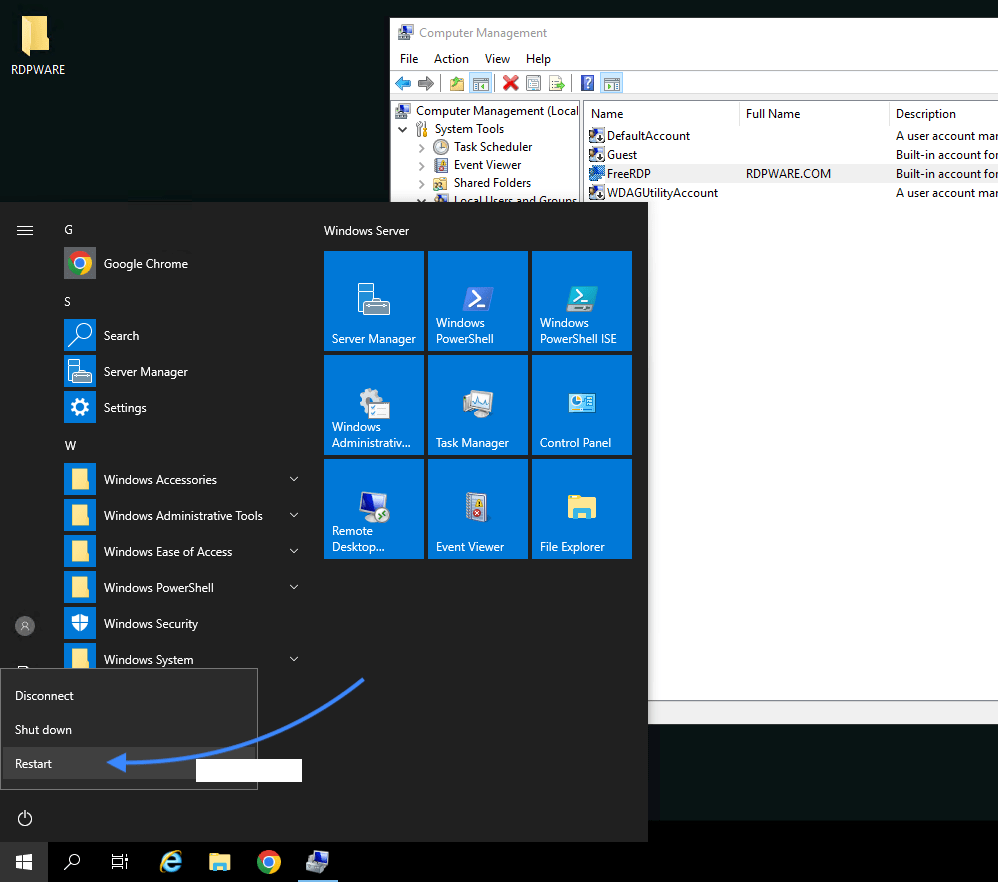
- Click on the Start menu, select the power icon, and choose “Restart” to reboot the server.
- Once the server restarts, log back in using your new username and the same password.
- Done: We have successfully changed the username.

Troubleshooting Tips
If you encounter issues while changing the username in your Windows RDP session, consider the following troubleshooting tips:
- Administrative Privileges: Ensure you are logged in with an account that has administrative rights on the remote server. Changing usernames requires these permissions.
- Double-Check Steps: Confirm that each step in the process was followed accurately. Missing a step or making a minor error can prevent the username change from applying correctly.
- Restart the Server: If the new username does not appear immediately, restart the server again to ensure that all changes are applied correctly.
- Verify User Account: Make sure the username you are trying to set does not already exist and is not conflicting with other account names on the server.
- Update RDP Connection Settings: If you use saved RDP connection settings, update the username field to match the new username to avoid login issues.
- Review Error Messages: Pay attention to any error messages during the process. These can provide clues on what might be going wrong and help in diagnosing the issue.
By following these troubleshooting tips, you can resolve common issues and ensure a smooth username change in your RDP session.
Conclusion
Changing the username in a Windows RDP session is a straightforward process that enhances security, aligns with organizational changes, and personalizes your remote desktop environment. By following these steps, you can efficiently update your username across all major Windows Server versions and continue your work seamlessly.


